| Read before using the strategy. |
| RequirementYou must do it. | You must join Paradoxum Group for an extra starter cash of $100. (Click the text to join the group)For the regular starter cash is $500. With joining the group, the regular starter cash is now $600. |
| StrategyUnderstand them first. | Follow the strategy in order from top to bottom.If a step includes arrows (⮕), it means those actions are part of the same phase and refer to the same instruction type (either Place or Upgrade, etc), but for different towers.Example: “Place 1 Lv 3 Pyro ⮕ 3 Lv 2 Commanders ⮕ 8 Lv 2 Rangers”Place 1 Lv 3 PyroPlace 3 Lv 2 CommandersPlace 8 Lv 2 Rangers(That counts as 3 steps total, all under the same “Place” instruction.)Words highlighted in white and underline are important.Place towers where the map placement guides you.“1 by 1” means to place/upgrade towers one at a time.Example: “Place 4 Lv 3 Scouts, 1 by 1”Place a Scout ⮕ Upgrade Scout to Lv 3 ⮕ then repeat 4 more times(Don’t place another tower till you get the required level)“Max” means to upgrade towers until you can’t upgrade anymore. |
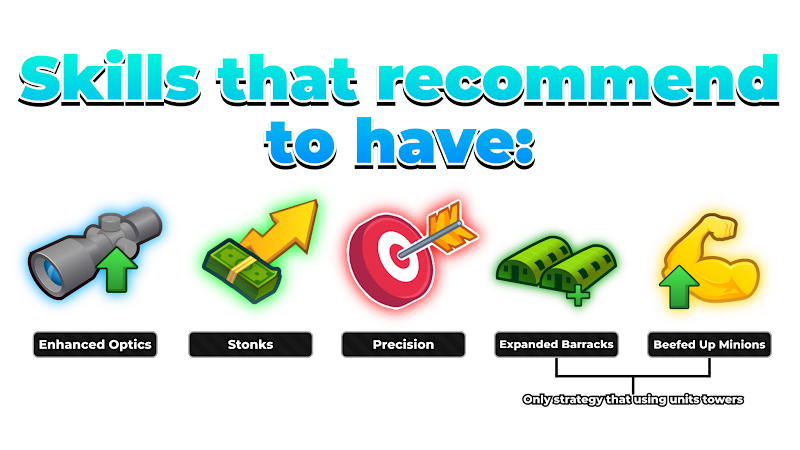
| Skill Tree InfosSkill tree that may be needed for a specific trial. | Skill Tree InformationsThe Skill Tree is optional, but using it can increase your chances of winning.Notes: All trial strategies are primarily tested without the Skill Tree. However, certain conditions (such as “Solo Quarantine”) may require it. |
  |
| Trial DifficultyRanking difficulty level of each trial. | All Challenge Trials DifficultiesThe higher the difficulty, the less consistent the strategy becomes and the more requirements or accessibility are needed to complete it successfully. |
  |   |   |   |   |   |   |
| Hard | MediumExtreme (Solo) | Extreme | Medium | MediumEasy (Solo) | Hard | Extreme |
  |   |   |   |   |   |   |
| Very EasyHard (Solo) | Insane | Hard | Easy | Insane | Easy | - |
| ExtraMore information. | Feel free to use our Private Server here.Challenge Trial is extremely relying on Skill tree. Everything here is tested without a Skill tree, you may have a higher chance to win with a specific Skill tree.Golden Cowboy / Golden Minigunner can be used. |